
harper and bright designs assembly instructions
Harper & Bright Designs Assembly Instructions: A Comprehensive Guide
Harper & Bright Designs offers diverse products; accessing assembly instructions is crucial for a smooth setup experience. ManualsLib hosts over 13 manuals, aiding in successful assembly.
Understanding the Brand & Product Range
Harper & Bright Designs has established itself as a provider of a wide array of home and lifestyle products, encompassing furniture, lighting solutions, and outdoor décor. Their catalog caters to diverse aesthetic preferences, from modern minimalist designs to more traditional styles. Understanding this breadth is key when approaching assembly, as instructions can vary significantly between product categories.
The brand emphasizes both functionality and style, often incorporating contemporary features into classic designs. This means assembly may involve more than just basic construction; it could include electrical wiring for lighting fixtures or fabric attachment for outdoor furniture. Recognizing the specific product type – chair, table, lamp, or outdoor set – is the first step towards locating the correct, detailed assembly instructions, often available online through resources like ManualsLib.

Locating Assembly Manuals Online
Finding Harper & Bright Designs assembly instructions online is typically straightforward. A primary resource is ManualsLib, which currently hosts more than 13 manuals specifically for this brand. Searching by model number – often found on the product packaging or a sticker on the item itself – will yield the most accurate results.
Additionally, checking the retailer’s website where the product was purchased can often provide direct links to downloadable PDFs. Assembly instructions are frequently listed in the “Support” or “Downloads” section of the product page. Remember to note the specific code (e.g., WF189430BAA) associated with your product, as this ensures you’re accessing the correct guide for a seamless setup.
Common Tools Required for Assembly
Successfully assembling Harper & Bright Designs products generally requires a few standard tools. A Phillips head screwdriver is almost always essential, as are often flathead screwdrivers in various sizes; An Allen wrench set (hex keys) is frequently needed, particularly for furniture assembly.
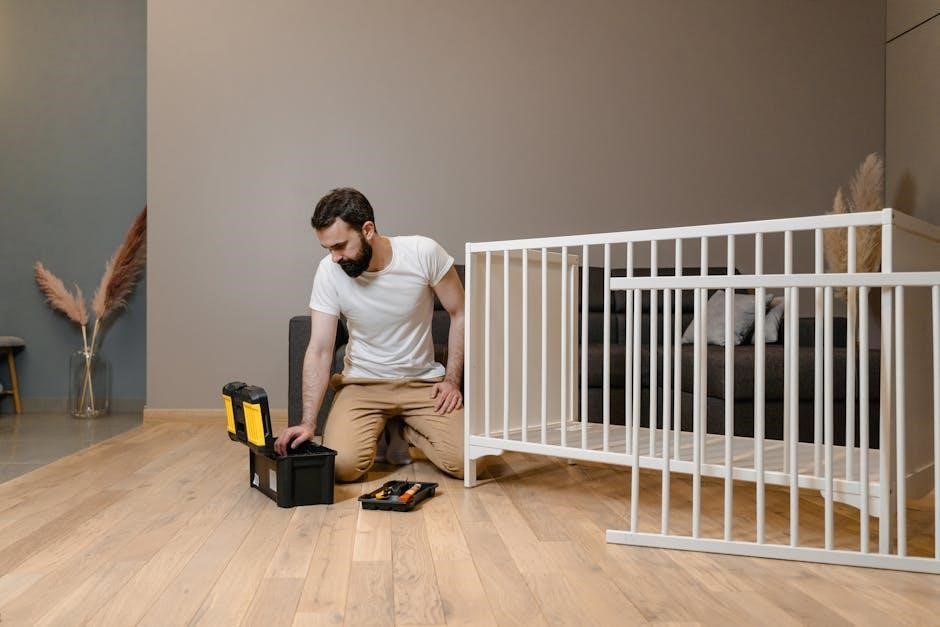
Depending on the product, a rubber mallet can be helpful for gently tapping pieces into place without causing damage. While not always necessary, a power drill with adjustable torque settings can significantly speed up the process, but use caution to avoid over-tightening. Finally, having a measuring tape and level on hand ensures accurate alignment and a stable finished product.

Step-by-Step Assembly Process ー General Tips
Harper & Bright Designs assembly benefits from careful preparation, part identification, and diligent diagram following for a streamlined, successful build experience.
Preparing Your Workspace
Before beginning Harper & Bright Designs assembly, dedicate a spacious, well-lit area to prevent frustration and ensure accuracy. Protect your flooring with a drop cloth or cardboard to avoid scratches during the process.

Clear the workspace of any obstructions, allowing ample room to maneuver around the components. Gather all necessary tools – often including screwdrivers, wrenches, and potentially a rubber mallet – and keep them within easy reach.
Organize the hardware (screws, bolts, washers) into labeled containers or a compartmentalized tray. This prevents confusion and saves valuable time during assembly. A clean, organized workspace significantly contributes to a smoother and more enjoyable building experience with Harper & Bright Designs products.
Identifying Parts & Hardware
Carefully unpack all components of your Harper & Bright Designs product and compare them against the parts list included in the assembly manual. Pay close attention to the shape, size, and any unique markings on each part.
Hardware, such as screws, bolts, and washers, is often categorized by size and type. Utilize the provided diagrams to correctly identify each piece. Separating and organizing the hardware into labeled containers is highly recommended to avoid confusion during the assembly process.
Double-checking that all parts are present before starting will prevent delays and frustration. If any parts are missing, refer to the troubleshooting section or contact Harper & Bright Designs customer support.
Following the Diagram – A Visual Guide
Harper & Bright Designs assembly manuals prioritize clear, step-by-step diagrams. These visuals are designed to guide you through each stage of the process, illustrating how parts connect and the correct orientation for hardware.
Carefully study each diagram before attempting the corresponding step. Pay attention to arrows indicating direction, and any highlighted areas emphasizing crucial connections. Diagrams often show exploded views, revealing the internal structure and component relationships.
Use the diagram as a reference throughout the assembly, frequently checking your work against the illustration. A methodical approach, guided by the visual instructions, will ensure a successful and accurate build.

Specific Assembly Instructions by Product Category
Harper & Bright Designs provides tailored assembly guides for furniture, lighting, and outdoor items, ensuring each product receives focused, detailed instructions for a perfect setup.
Furniture Assembly (Chairs, Tables, etc.)
Harper & Bright Designs furniture assembly often begins with attaching legs & supports, requiring careful alignment and secure fastening. Connecting table tops & surfaces demands precision, ensuring stability and a flush finish.
Prioritize identifying all components before starting. Double-check hardware against the parts list. When attaching legs, ensure they are oriented correctly for optimal weight distribution. For tables, evenly distribute screws during surface connection to prevent warping.
If encountering resistance, avoid forcing parts; re-examine the instructions. A properly assembled chair or table from Harper & Bright Designs provides lasting enjoyment, so patience is key!
Attaching Legs & Supports
Harper & Bright Designs furniture stability hinges on correctly attaching legs & supports. Begin by identifying the correct leg orientation – often indicated by pre-drilled holes or specific markings. Ensure the support brackets align perfectly with the furniture frame before fastening.
Use the provided hardware, avoiding over-tightening initially. Gradually tighten screws in a criss-cross pattern to distribute pressure evenly. This prevents warping or instability. Check for wobble; if present, slightly adjust screw tightness.
Properly secured legs and supports are fundamental for long-lasting furniture. A stable base ensures safety and enhances the overall aesthetic of your Harper & Bright Designs piece.
Connecting Table Tops & Surfaces
Harper & Bright Designs table assembly requires careful connecting of table tops & surfaces. Begin by aligning the tabletop with the base, ensuring even overhang on all sides. Locate the pre-drilled holes and identify the corresponding hardware – typically screws or cam locks.
If using cam locks, insert them into the designated holes and rotate to secure. For screws, start by hand-tightening to prevent cross-threading, then use a screwdriver to firmly attach the surfaces.
Double-check alignment and stability. A securely connected tabletop is crucial for functionality and safety. Avoid excessive force, which could damage the materials.
Lighting Fixture Assembly (Lamps, Chandeliers, etc.)
Harper & Bright Designs lighting assembly demands precision and adherence to safety guidelines. Begin by carefully unpacking all components and verifying against the parts list. Lighting fixture assembly, whether lamps or chandeliers, often involves wiring & electrical connections.
Always disconnect power before starting. Identify the hot, neutral, and ground wires. Connect wires according to the diagram, using wire connectors for secure joins. Ensure no bare wires are exposed.
Proceed to installing bulbs & shades, ensuring compatibility and proper fit. Double-check all connections before restoring power. A properly assembled fixture ensures both illumination and safety.
Wiring & Electrical Connections
Harper & Bright Designs lighting requires careful wiring & electrical connections. Prioritize safety: always disconnect the power supply at the breaker before commencing any work. Identify the hot (usually black), neutral (white), and ground (green or bare copper) wires.
Match wire colors according to the fixture’s instructions. Use appropriately sized wire connectors, twisting securely to ensure a firm connection. Avoid exposing bare wires – this is a significant safety hazard.
Double-check all connections before restoring power. If unsure, consult a qualified electrician. Incorrect wiring can lead to fire or electrical shock.
Installing Bulbs & Shades
Harper & Bright Designs fixtures require correct bulb installation. Verify the wattage compatibility – exceeding the maximum can cause overheating and damage. Gently screw in the bulb, avoiding excessive force. Ensure it’s securely seated but not overtightened.
When installing shades, carefully align the shade with the fixture’s frame. Secure it using the provided hardware, such as screws or a retaining ring. Avoid applying pressure to the glass components.
Inspect the shade for any cracks or damage before installation. Always handle glass shades with care to prevent breakage and potential injury.
Outdoor Furniture & Decor Assembly
Harper & Bright Designs outdoor pieces often involve assembling frames and attaching fabric elements. Begin by laying out all components and identifying each part using the included diagram. Assemble the frame, ensuring all connections are secure and tightened with the appropriate tools.
Attaching fabric or cushions typically requires aligning the material with the frame and securing it with screws, clips, or Velcro. Ensure the fabric is taut and evenly distributed for a polished look.
Periodically check all connections for tightness, especially after exposure to weather. Proper assembly ensures durability and enjoyment of your outdoor space.
Assembling Frames & Structures
Harper & Bright Designs outdoor furniture frame assembly begins with identifying all structural components. Carefully align pieces according to the provided diagrams, ensuring correct orientation before fastening. Utilize the appropriate hardware – often bolts, screws, or cam locks – and tighten securely, but avoid over-tightening which can damage materials.
Pay close attention to corner joints and support structures, as these are critical for stability. If the structure includes multiple sections, assemble each individually before connecting them. Double-check all connections for firmness and alignment before proceeding.
A stable frame is the foundation for durable outdoor enjoyment.
Attaching Fabric & Cushions
Harper & Bright Designs outdoor furniture often requires attaching fabric or cushions to assembled frames. Begin by carefully positioning the fabric, ensuring even distribution and proper alignment with the frame’s edges. Secure the fabric using provided fasteners – typically ties, Velcro straps, or clips – following the diagram closely.
When attaching cushions, verify they fit snugly and securely within the frame; Some cushions may have ties or straps to further secure them. Regularly inspect these attachments to prevent shifting or detachment in windy conditions.
Properly secured fabric and cushions enhance comfort and prolong furniture life.

Troubleshooting Common Assembly Issues
Harper & Bright Designs assembly can present challenges like missing parts, misalignment, or damaged components. Careful review of instructions and contacting support resolves these issues.
Missing Parts & Hardware
Encountering missing parts during Harper & Bright Designs assembly is a common frustration. First, meticulously re-check all packaging materials – smaller hardware often hides within protective layers. Compare the received components against the parts list detailed in your assembly instructions.

If a part is genuinely missing, don’t attempt to substitute with alternatives, as this could compromise structural integrity or safety. Contact Harper & Bright Designs customer support immediately, providing your product name, model number, and a clear description of the missing item.
Be prepared to potentially submit photos of the packaging and included parts as verification. Most reputable companies will promptly ship replacement hardware, ensuring a complete and successful assembly process.
Incorrectly Aligned Components
Misalignment during Harper & Bright Designs assembly often stems from rushing the process or failing to fully seat components. Before tightening any screws or bolts, ensure all parts are correctly positioned according to the assembly instructions’ diagrams.
Loosely assemble sections first, allowing for adjustments. If holes don’t line up, avoid forcing them – this can strip threads or damage the material. Gently try repositioning the parts, checking for obstructions or reversed orientations.
Sometimes, slightly loosening adjacent connections can provide the necessary wiggle room for proper alignment. If persistent, double-check the parts list to confirm you’re using the correct components in the intended locations.
Stripped Screws & Damaged Parts
Stripped screws during Harper & Bright Designs assembly are frustrating, often caused by over-tightening or using the wrong screwdriver size. Avoid excessive force; stop when resistance increases significantly. If a screw begins to strip, immediately cease tightening it;
For minor stripping, a rubber band placed between the screwdriver and screw head can sometimes provide extra grip. Severely damaged screws may require replacement – contact Harper & Bright Designs customer support for assistance.
Inspect all parts for damage before beginning assembly. If a component is already damaged, do not use it and request a replacement. Careful handling throughout the process minimizes the risk of further damage.

Safety Precautions During Assembly
Prioritize safety during Harper & Bright Designs assembly! Protect yourself and your surroundings, and always handle tools responsibly to prevent injuries or damage.
Protecting Yourself & Your Surroundings

Ensuring a safe assembly environment is paramount when working with Harper & Bright Designs products. Begin by clearing a spacious workspace, free from obstructions and potential tripping hazards. Protect flooring with a drop cloth or cardboard to prevent scratches or damage during the process.
Wear appropriate safety gear, including safety glasses to shield your eyes from flying debris and work gloves to protect your hands. Keep children and pets away from the assembly area to prevent accidental injuries. Be mindful of your surroundings and ensure adequate lighting to clearly see all parts and instructions.
Dispose of packaging materials responsibly and avoid creating clutter that could pose a safety risk. A well-prepared and organized workspace significantly contributes to a safer and more efficient assembly experience.
Handling Tools Responsibly
Proper tool handling is essential for a safe and successful Harper & Bright Designs assembly. Always use tools that are appropriate for the task at hand, avoiding improvisation that could lead to damage or injury. Inspect tools before use, ensuring they are in good working condition with no loose parts or damaged handles.
When using screwdrivers, apply steady and even pressure, avoiding excessive force that could strip screws. Utilize wrenches correctly, ensuring a secure grip to prevent slippage. Power tools, if required, should be operated with caution, following all manufacturer’s safety guidelines.
Never leave tools unattended in the assembly area, and store them securely when not in use. Responsible tool handling minimizes the risk of accidents and ensures a smooth assembly process.